


You can handle the selling and producing of B&W or Sepia images in ProSelect a number of different ways...
The Easiest Way
ProSelect has a built-in convertor that will instantly convert any color images to either B&W or Sepia with the click of the "B" or "S" buttons in the right-hand tool bar. Since this is a "dynamic" conversion, the image can be instantly converted back using the "O" (or Original) button.
In ProSelect's Preferences (under the Image Effects - General Effects) you can make some adjustments to the B&W and Sepia effects produced by ProSelect to match your liking. Note: This setting is for display purposes only and does not carry through to production.
When you order an image with either of these effects, ProSelect records the applied effect along with the image number and this will show up on the Order Report.
What happens in Production
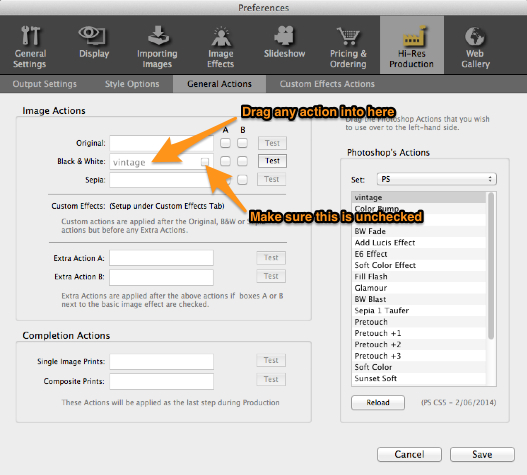
When it comes to producing the ordered image in the High-Res Production part of ProSelect Pro, by default, ProSelect will apply its own B&W or Sepia conversion in Photoshop using the original High-Res image. If you prefer to use your own actions instead of the default ones then, in the Preferences -> Hi-Res Production -> General Actions -> Image Actions drag in YOUR Photoshop conversion actions in the B&W and/or Sepia boxes from the list on the right-hand side. To clarify: if these boxes are empty, ProSelect's default conversion is applied - if not empty then ProSelect will run the actions that you have selected.
The advantage of this approach is you can easily show the client different options and still produce the final images exactly how you want them to appear. You can also order the same image in color, B&W and Sepia (by using the Duplicate button in ProSelect and applying a different effect to each copy).
If you have applied a default B&W or Sepia Action to your images and don't want ProSelect to run its default actions on these images in Production, then you can add any action to the B&W and/or Sepia boxes in Preferences -> Hi-Res Production -> General Actions -> Image Actions and just disable the action by unchecking the checkbox.
Displaying a Custom B&W effect
If you don't want to use ProSelect's B&W or Sepia conversion buttons during the presentation, then consider using the Custom Effects button to run your special action on the low res images in ProSelect. You set this up in the Preferences -> Image Effects -> Custom Effects Actions. See the ProSelect Reference Manual for more details on how to setup and use Custom Effects.
ProSelect will record all custom effects applied to an ordered image and carry this into Production. By default, the same custom action will be used during Hi-Res production unless you specifically change it or disable it (by unchecking the checkbox) under the Hi-Res side of the Custom Effects list.
Starting with an Imported B&W original image
If you want to do your B&W conversions on the original images BEFORE importing them into ProSelect. In this case, treat them as normal color images, order them as such and, by default, no action effects will be applied during production so they will remain the same (except for sizing and cropping). Note: In this case, the order report will NOT say they have been ordered as B&W however, if you are printing the Order report on a color printer the thumbnails will be in B&W.
KnowledgeBase Article: B&W and Sepia Image Workflow