


Keeping track of images for head swaps can sometimes be confusing. Hopefully, this procedure will simplify the process. Head swaps can happen at a couple of different levels. First, the client having input during the ordering session and the swaps happen in post-production, or secondly, composite images can be created prior to the client viewing
When ordering images with heads swaps, several factors need to be considered. All of the following is addressed in this process.
- The source image and the person needs to be identified.
- The base image needs to contain notes
- Both source and base images need to be included in the production queue
- If retouching is outsourced, all required images must be in a production package
Setting up ProSelect.
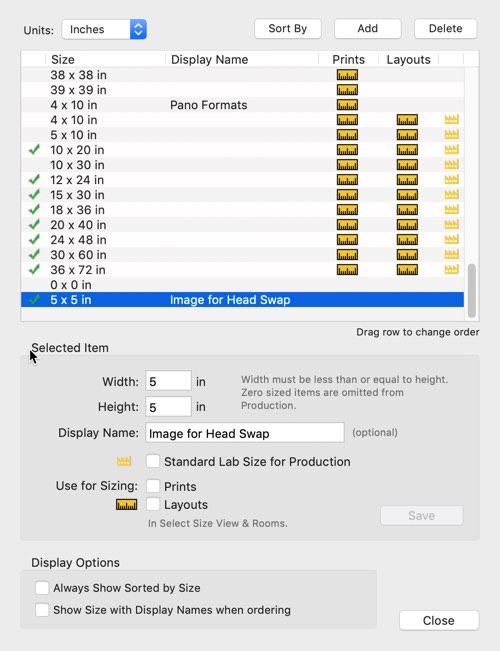
- In Orders > Print Paper Sizes, add 5x5. In the description add “Image for Head Swap”. Neither of the rulers needs to be checked.
- In Orders > Presentation Options add “Production File Only”.
- In Orders > Price List and Products, add the “Image for Head Swap”, with the presentation, “Production File Only”. Add a product code if needed. Enter a price.
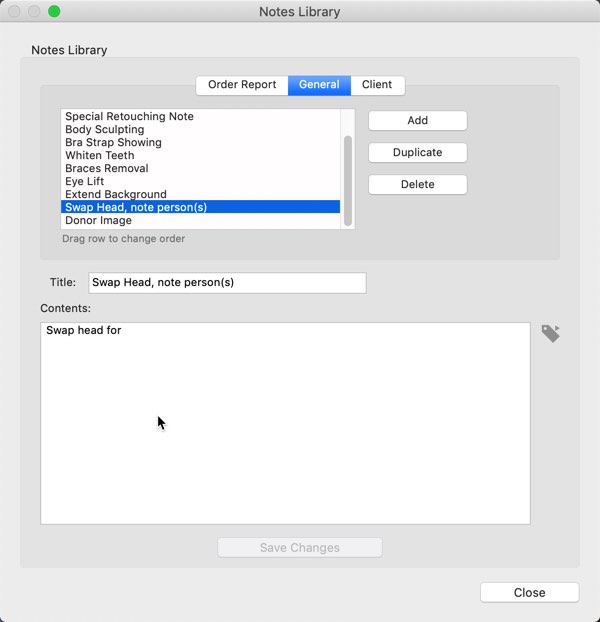
- In Resources > Notes Library > General Notes > Add
Title: Swap Head, note person(s)
Contents: Swap head for
Title: Doner Image
Contents: Donor file for Head Swap on Image #
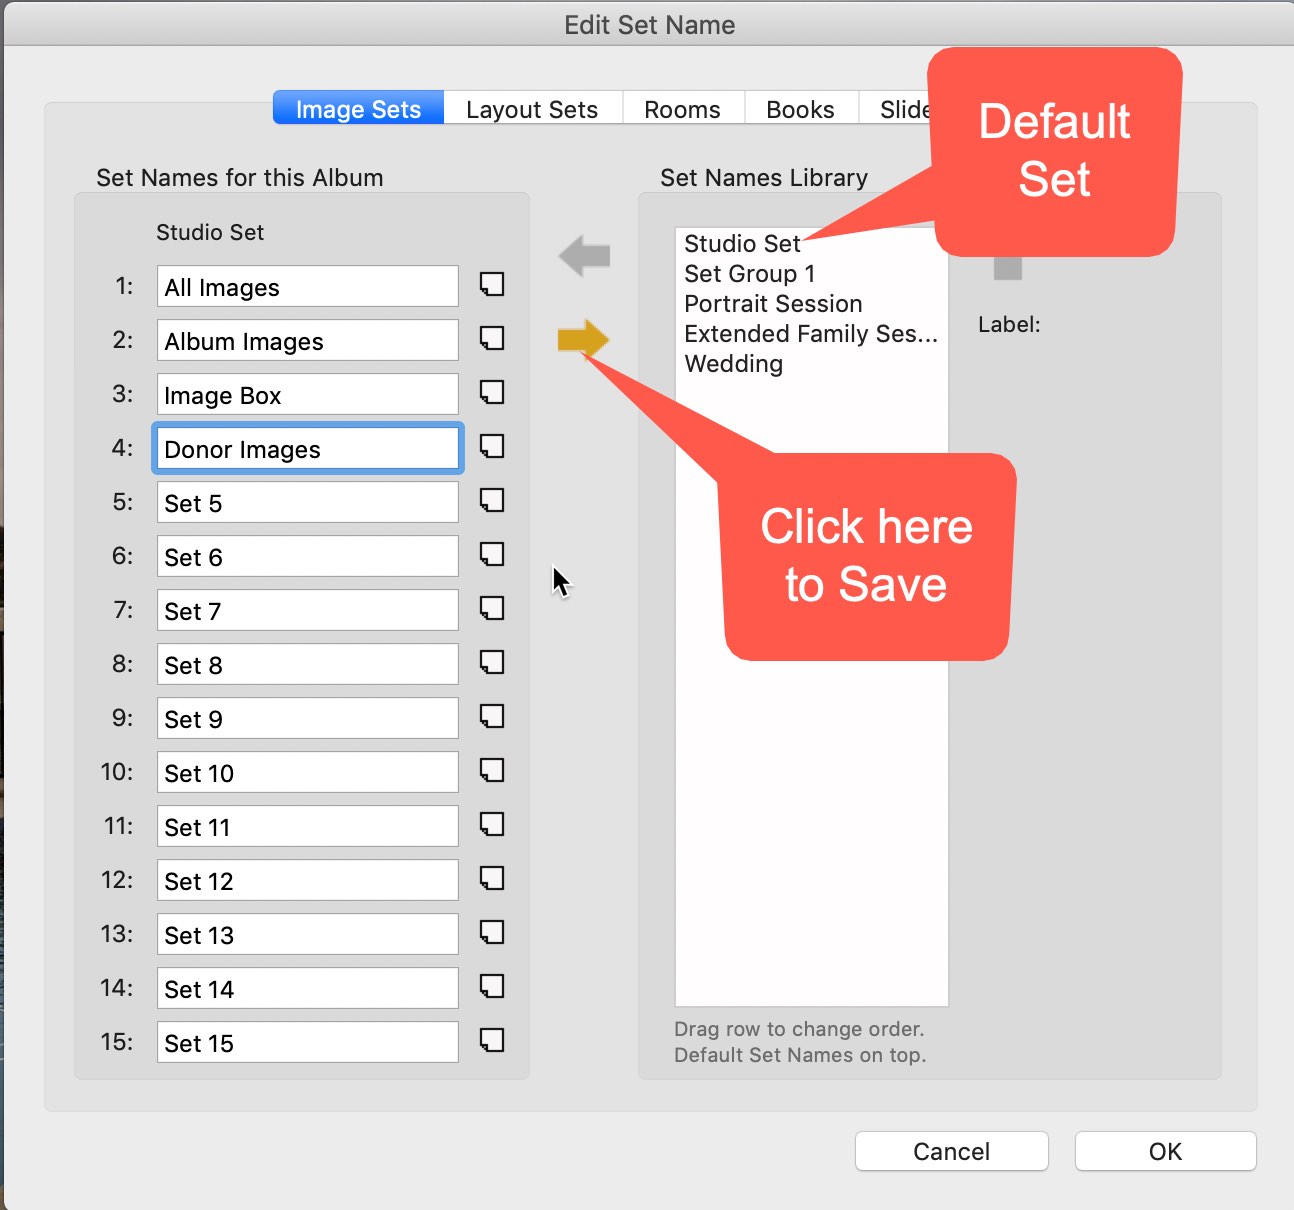
- In your Image Sets, double-click on Set 1. The Edit Set Name dialog opens. Rename any sets that would be useful for all your orders. Be sure to add a set name for “Donor Images” or “Head Swaps”. Click the gold arrow and name the set. Dragging it to the top of the list will make it so all new albums will contain this naming series.
Sorting Images
As you are reviewing images with your client, you can move any images for "donor" consideration to the "Donor Images" Image Set. To add an image to the set, just drag and drop it on the "Donor Images" file icon. The image will be moved. If you prefer to add a copy, hold the ALT/ OPT key while dropping and a copy will be placed in the folder.
Ordering Images
- Determine the file for the base image. Click the notes icon and click “Add from Library” choose “Swap Head, note person(s)”. Type in the names and position of the head to be swapped.
- Place an order for the image including any matting and framing if ordered.
- If you moved images to the "Donor Image" set, you'll need to move to that set. Find the donor image with the desired head. Choose the crop tool using a square (1:1) crop. Crop the image to the head of the person to be used with the source image. Click the notes icon and click “Add from Library” and choose “Donor Image”. Type in the base file image number.
- Order the image. The product will be “Image for Head Swap”. If you entered a price, that charge will appear on the invoice. If you don’t charge, that is fine, but it’s important to put a value on the digital services. If you add the charge, you can discount it. Click “Add with Extras”, then type 100 in the % dialog at the far bottom. Clicking the % button will add the name Discount and offset the charge. Click Save Changes.
- Repeat the donor process for any other head swaps.
The Results
All the information required will be shown on the invoice so it is clear for both you and the customer.

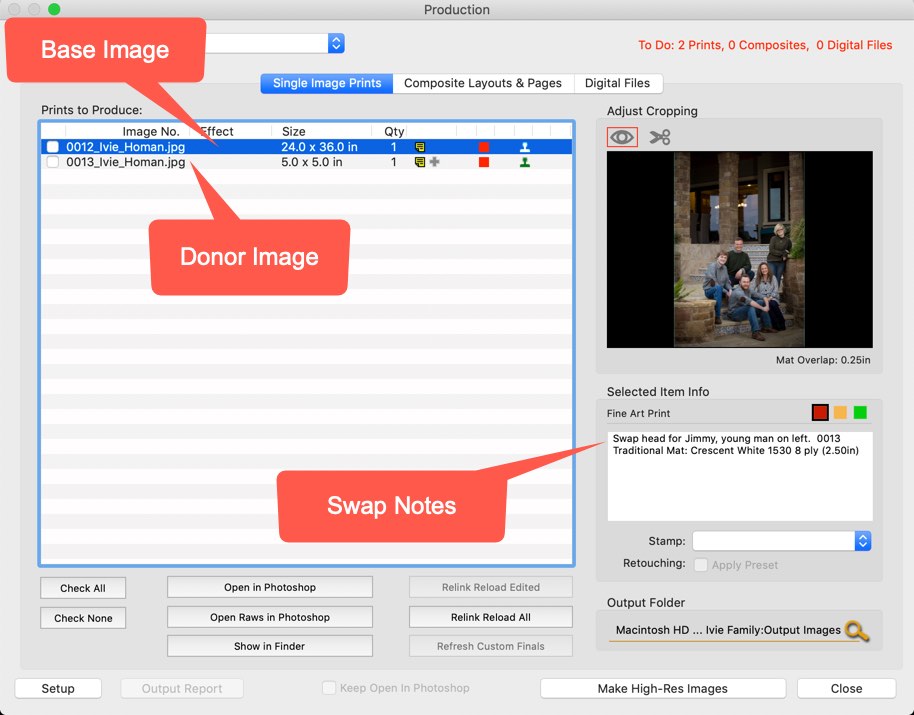
In the High-Res Production window, all the required images are listed and the accompanying notes. If you export a Production Package to provide to an outsource retoucher, all the required files and notes are included in the package.
Head Swaps Prior to Customer Viewing
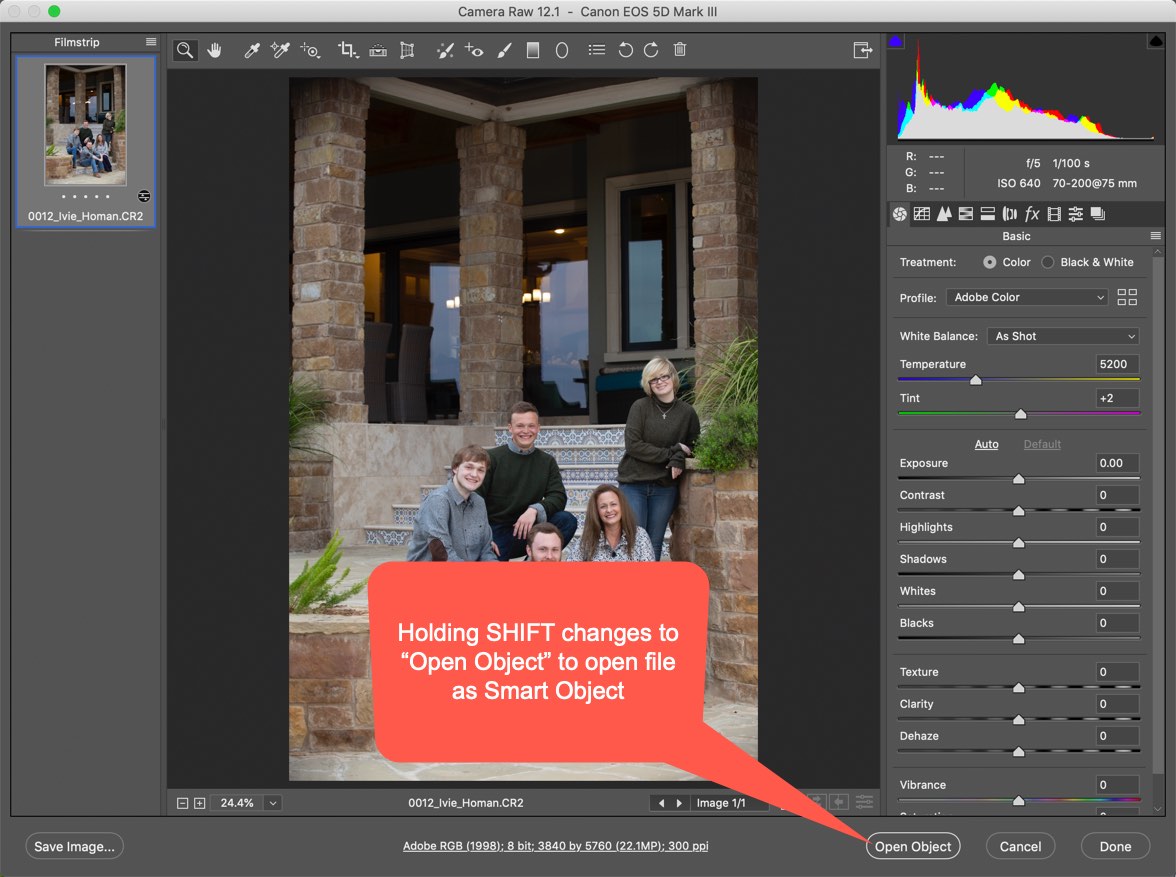
- In ProSelect, select the image you want to use as a base file. Do CMD or CTRL Y to open the image in Adobe Camera Raw. Do any processing adjustments. When complete, hold the SHIFT key. The Open Image button will change to Open Object. Click it to open the file as a Smart Object in Photoshop.
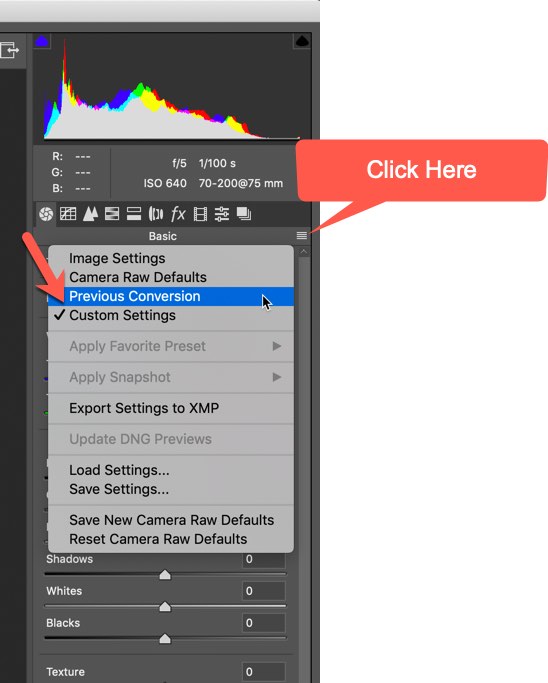
- In ProSelect, find the image to use for a replacement head. Do CMD or CTRL Y. In the Adobe Camera Raw dialog, click on the four lines in the top right above the processing controls. Choose “Previous Conversion”. The same conversion settings will be applied to the image as the source file. Hold the SHIFT key, then click Open Object.
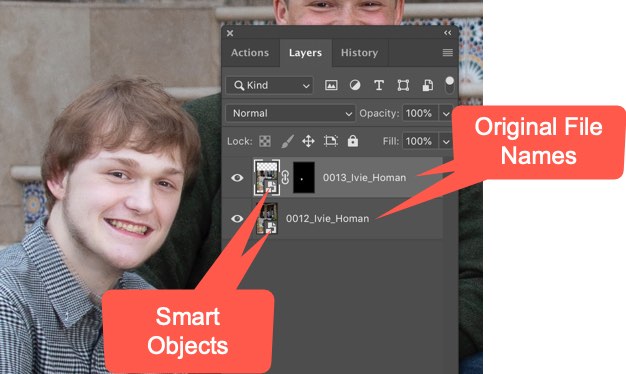
- On the file with the replacement head, drag the layer to the base image. Your base image will now contain two layers. You can close the replacement head file.
- Change the layer blend mode containing the replacement head to "Difference". Using the move tool, align the head to be replaced. Once aligned, change the blend mode back to Normal.
- Hold the ALT/ OPT key and click the layer mask icon. A mask will be added, filled with black. Using white, paint on the mask to expose the head.
- Once the file is prepared for the viewing, save it as a PSD file. Save it in the same folder with the same file name. Keep in mind, this does not have to be perfect at this point. Final refinements can be made during final production. It just needs to be good enough for the customer to approve the “pose and expressions”. Close the file.
- In ProSelect, select the base image, then do SHIFT + CMD or CTRL U. This will replace the linked JPEG file with the new PSD file. You can then add a note about head swapping.
- This file contains all the information needed for final production. Since the layers are smart objects, the file names are contained in the layers and the raw files can be reprocessed if needed. The linked PSD is what will be sent into the High-Res Production queue.
KnowledgeBase Article: Ordering Images with Head Swaps in ProSelect